

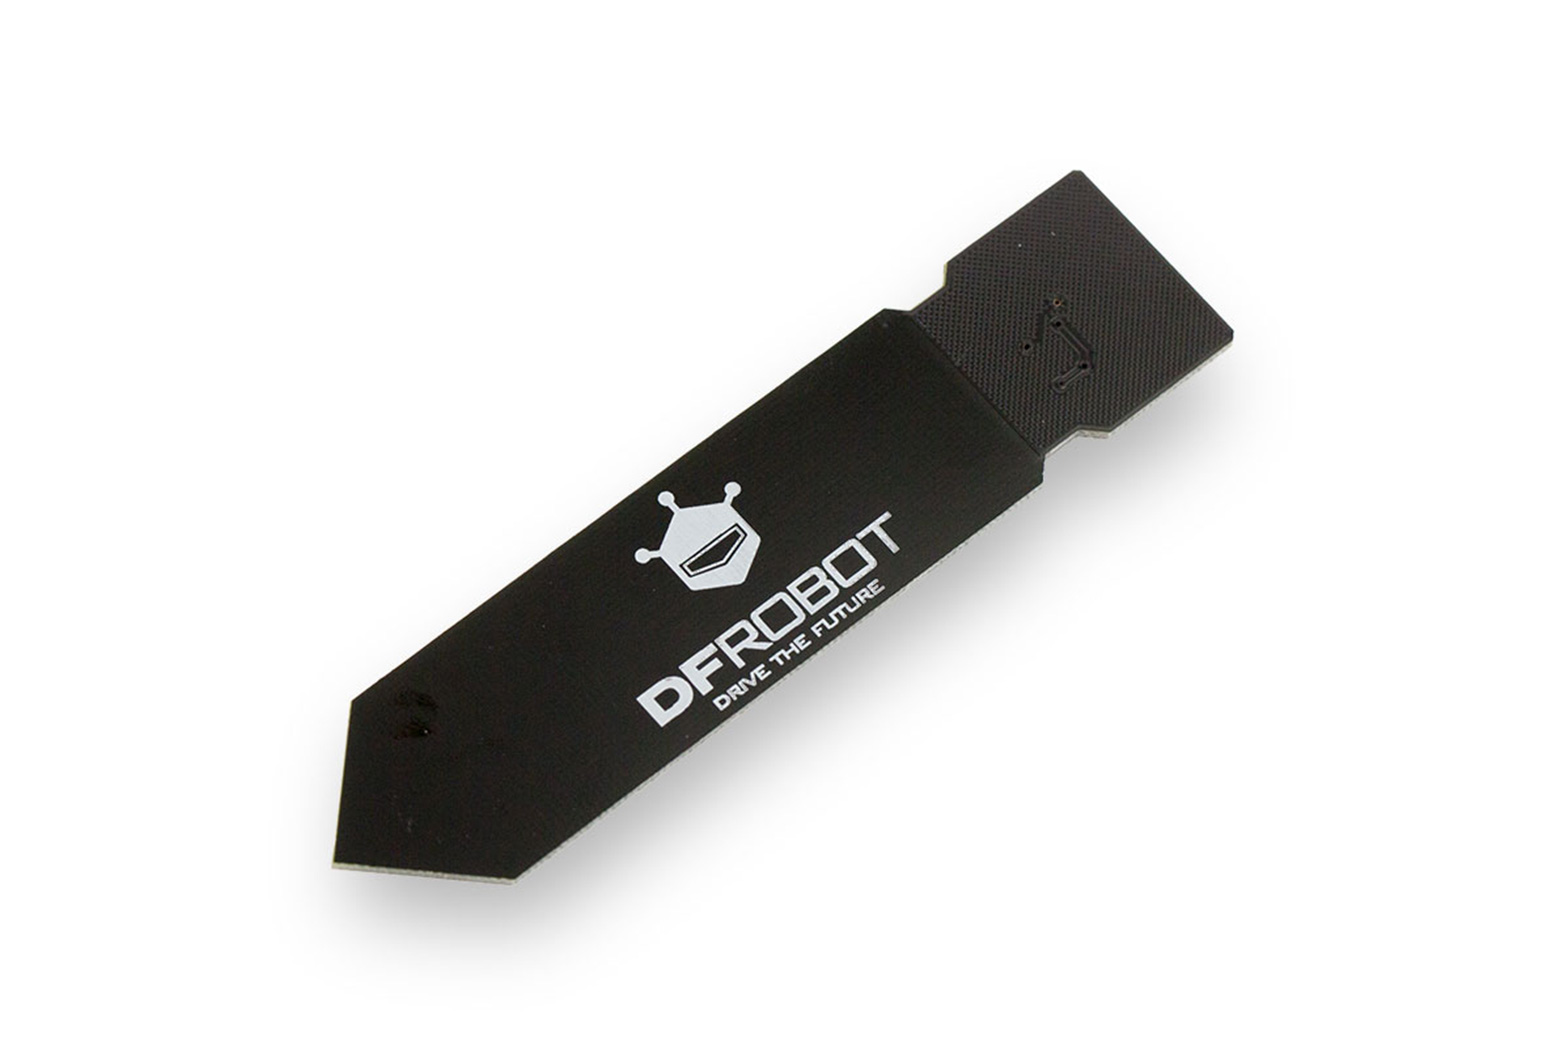
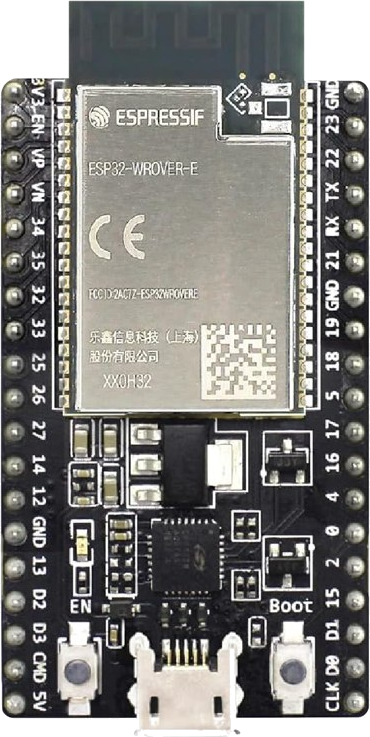
How wet the root zone is, from the pot or the bed you actually care about, landing somewhere that belongs to you. That is the whole job of this node. Two parts and three wires: a classic ESP32 board, a capacitive soil-moisture probe, and a firmware you flash from this page in about a minute. Then a calibration you do on the probe itself, in dry air and a glass of water, so the number it sends is that probe's number and not a stranger's.
Everything after the wiring is settled on a form the device serves itself, from a phone standing over the bed. Where the readings go is your decision and stays your decision. Cheap parts, doing the one thing worth doing with a sensor: turning a real place into a number you own.
What it does.
A capacitive soil probe is a copper trace under solder mask, a small oscillator, and a filter. Water around the trace raises its capacitance, the oscillator slows, and the output voltage falls as the soil gets wetter. That is the entire instrument. This node reads that voltage on a cadence you choose, averages the readings across the push window so one noisy sample never becomes the number of record, and pushes it to an endpoint you own: your own webhook, an MQTT broker you run, Home Assistant, or Open Agriculture Technology.
It sends two things for each probe. The voltage, always, because that is what was measured and it is the number you can recalibrate against years from now without visiting the node. And a moisture percentage, but only after you have shown that probe what dry air and water look like. Until then, no percentage. A gap is honest; a number made up from somebody else's probe is not.
Here is where this page differs from the SHT-30 and DS18B20 pages, which quote the manufacturer's accuracy tables. There is no accuracy table for a capacitive probe, because there is no accuracy. What the maker of the most-copied one publishes is this:
| Parameter | Value |
|---|---|
| Operating voltage | 3.3 to 5.5 V DC |
| Output voltage | 0 to 3.0 V DC |
| Operating current | 5 mA |
| Interface | three pins: VCC, GND, AOUT |
| Accuracy | not specified |
| Units | none. A voltage that falls as the soil gets wetter. |
Three things worth understanding before you trust a reading. Two probes from one bag disagree: in the same glass of water they can read hundreds of millivolts apart, which is why the calibration on this node is per probe, on the probe, and not a pair of numbers typed in from a forum. The soil moves the curve: sand, peat and clay each give a different voltage at the same wetness, and salts in the water move it again. A percentage from this node means between the two states you showed it, in this soil. It is not volumetric water content and it is not tension; the Soil Moisture Tension page explains the difference, and the SDI-12 Reader is the door to instruments that report those. The line is the limit: the blade has a line marked below its electronics. Soil past the line, or water on the electronics, ends the probe.
What a cheap capacitive probe is honestly good for is the dry-down curve: the shape of a pot or a bed drying over days, repeated, so you learn when the zone actually dries rather than when you assume it does. That is a watering decision, and it is the Root Zone starter this library has been promising. Read it yourself: the DFRobot wiki is the closest thing to a datasheet the part has.
That is the Collect layer at its plainest. Getting a real number out of a real place, reliably, into somewhere that belongs to you.
See it in action: the Open Agriculture Technology Test Endpoint is live right now, our own gateways pushing readings, and yours can join them in minutes.
What you need.
A few dollars for the probe and nothing you have to solder if you buy one with its lead already on it:
The probe wants to go into the soil vertically, to the line and no further, with its electronics above the surface and out of the spray. In a pot that is the wall of the pot, away from the drip. In a bed it is the root zone of the plant you are watering by, not the gap between rows.
Wire it up.
Three wires, and the pin is chosen for you. Power off while you wire:
| On the probe | Wire color | On the ESP32 | Note |
|---|---|---|---|
| VCC | red | 3V3 | 3V3 is enough, and 5 V buys nothing: the probe's output is 0 to 3 V on either supply. |
| GND | black | GND | Either GND pin. |
| AOUT | yellow | GPIO 35 | The output. The next probes go to 34, 32, 33, 36, 39. |
The analog pins, by board
- Classic ESP32 first probe on 35, then 34, 32, 33, 36, 39
- ESP32-S3 first probe on 4, then 1, 2, 5, 6, 7, 8, 9, 10
- ESP32-C3 first probe on 4, then 0, 1, 3
- ESP32-C6 first probe on 6, then 0, 1, 2, 3
Why those and no others
- Every ESP32 has two analog blocks and only the first keeps working while Wi-Fi is on. These are that block's pins.
- Minus the strapping pins a probe would hold high at power-on: 3 on the S3, 2 on the C3, 4 and 5 on the C6.
- Six probes per board on every chip. The pin field refuses anything else and says why.
Why 3V3 and not the 5 V pin. Because it is enough, and because it is safe. The v2.0 probe is specified for 3.3 to 5.5 V in and gives the same 0 to 3.0 V out across that whole range, so a 5 V supply buys no signal at all. What it does buy is a 5 V rail on the same header as analog pins that are not 5 V tolerant, one slipped jumper away from a dead board. On the bench, on 3V3, this probe read 2876 mV in dry air and 1232 mV in a glass of water. Dry air sits near the top of the ESP32's converter, where it is least linear; that is one more reason the calibration is captured on this board, on this pin, on that same scale, rather than typed in from a chart. Whatever the converter does to 2.9 V, it does the same thing every time.
Why 35 on the classic, and why only 32 to 39 there. A classic ESP32 has two blocks of analog inputs. One of them shares its circuitry with the Wi-Fi radio and stops answering the moment Wi-Fi is on, which on this node is always. A probe on one of those pins reads perfectly on the bench and goes dead the moment the node joins your network, which is a confusing afternoon. The other block is GPIO 32 to 39, and two of those are not brought out on a devkit. That leaves six pins: 32, 33, 34, 35, 36 and 39. GPIO 35 is the default because it is input-only, so nothing in the firmware can ever drive it by accident, and because it is the pin the bench unit was wired to. The pin setting on the setup page refuses any pin outside those six and tells you why.
Flash it.
Plug the board in and press the button. The installer reads the chip on the wire and refuses to write if it isn't the board this image is for, so there is nothing to get wrong.
If the board won't take the flash, or it restarts over and over
Hold the BOOT button down while you plug the USB cable in. Let go once it is plugged in, then press the install button above. That is the whole fix, and it is worth trying first any time a board is being stubborn.
Here is what is going on. A board with no working firmware on it restarts several times a second, forever, because it looks for a program to run and finds nothing. The installer needs the board to hold still long enough to write a megabyte and a half, and it cannot get hold of one that keeps restarting. Holding BOOT as the power arrives puts the chip into the loading mode it was built with, where no program runs at all, so there is nothing to restart and the installer gets a still target.
If you have a serial monitor open, you will know it worked because the scrolling stops. Quiet is what you want.
You may also see invalid header: 0xffffffff repeating in the monitor. That reads like damage and it is not: it is what an empty chip looks like, which is exactly where a board lands if a write was interrupted. The board is fine. Flash it again with BOOT held and it will come back.
If it flashes and runs fine on its own but fails the moment the sensor is connected, suspect whatever sits between them before you suspect either one. A screw-terminal carrier, an adapter board or a breakout is a component too, and a bridged or cracked terminal on one will stop the board booting while the sensor and the ESP32 are both perfectly good. Detaching the sensor is the quickest test: if the board comes back to life, neither it nor the sensor is at fault, and the thing in the middle is where to look. That exact fault cost us most of a night.
Two other things are worth checking before you decide a board is bad. Use a data USB cable, since a charge-only cable carries power but no signal and gives you the same symptoms. And plug straight into the computer rather than through a hub, because a write that browns out part way through leaves the board empty in just this way.
You'll need a data USB cable (not charge-only) and Chrome or Edge on a computer. A classic ESP32 talks to your computer through a separate USB chip, so the first time you plug one in you may need to install its driver once: look for CP2102 or CH340 printed near the USB socket, then fetch that driver. Once it's flashed, set it up from any phone or laptop.
Prefer the source? Browse it on GitHub: the full project, openly licensed, ready to build yourself.
Set it up.
All the setup happens on the device's own page. Nothing to install, and it works with no internet, which is what you want if you flashed a few at the extension office to take home.
- Power the node from any USB charger or your computer.
- On your phone or laptop, join the Wi-Fi network
OAT-Setup-XXXXXX(open, no password). A setup page opens by itself; if not, visithttp://192.168.4.1. - Sign in, then fill in the device name, your Farm ID, the location, your Wi-Fi, and where the readings should go. Press Save & Connect. It joins your Wi-Fi right away and shows you its new address, no reboot, no hunting for it.
- Open the node's Status page. The probe's voltage is right there, in large type: that is your proof the wiring is right. Then calibrate it, press Send a test reading, and look for the green confirmation that your endpoint received it.
The setup network stays on, so you can rejoin any time to change a setting, and your settings survive reboots, calibration included. A fresh firmware flash wipes them clean, on purpose, so a re-used board never carries the last owner's Wi-Fi, endpoint, or a calibration that belonged to a probe that is no longer attached.
Two knobs are worth understanding. Read the sensor every is how often it takes a reading; push interval is how often it sends. Every reading taken inside a push window is averaged into the number that gets sent, so reading every 10 seconds and pushing every minute gives you a steadier figure than reading once a minute, at no extra cost. Soil changes over hours, so there is no reason to push more often than every few minutes once you trust it.
The probe pins field is a list: 35 out of the box, 35,34 for two probes, and so on up to six. Nothing is discovered. A pin with nothing wired to it floats at a few hundred millivolts and reads exactly like a wet probe, so the node reads only the pins you list, and refuses a pin that cannot work, with the reason. That is deliberate: a pin setting is remembered and re-applied every time the board powers on, so a wrong one is not a mistake you get to notice and correct.
If the setup network is being fussy, everything above is also reachable over the USB console: type help for the list, or go straight to wifi, endpoint, name, set pins 35,34, and read. raw 20 prints every probe's live millivolts once a second for twenty seconds, which is the way to watch a dunk.
Ready to test it? Enter https://iot-test.openagriculturetechnology.com/ingest as the
endpoint URL on the setup page, then open the
Open Agriculture Technology Test Endpoint
and pick your farm, the gateway name you gave the node: your gateway and its probes show up live,
readings, charts and heartbeat, no account needed. It keeps about an hour of readings, enough to prove
the chain works before you point the node at an endpoint you keep. Prefer a message-by-message check?
The conformance sandbox shows each POST checked against the
standard.
Open the printable setup card (PDF)
A three-page field card: what to have on hand, the flash and setup steps, blanks for this node’s settings and each probe’s calibration, the console commands, and the fixes for the usual snags. Print one per node.
Calibrate it.
This is the part that turns a few-dollar probe into something you can water by, and it takes about two minutes per probe, on the setup page, with the probe in your hand.
- Hold the probe in the air, dry, and wait a moment for the reading on the setup page to settle. Under the probe's reading, press this is dry air. The node records the live voltage for that probe.
- Stand the probe in a glass of water, up to the line, and wait again. Press this is water. The node records that too.
- That is the calibration. From the next reading the probe sends a percentage as well as its voltage: 0 is the dry-air reading, 100 is the glass of water, and soil lands in between.
Each probe carries its own pair of numbers, kept by pin, so a second probe on GPIO 34 is calibrated in the same two presses and never borrows the first one's figures. The pairs are shown in the Calibration field as 35:2876/1232, pin, dry, wet, in millivolts, so you can copy them onto the setup card, type them back in after a reflash, or set them from the console with set cal 35 dry and set cal 35 wet.
The node refuses a calibration that cannot be right, and says why. A dry reading and a wet reading less than a tenth of a volt apart are not two different states, so it will not accept them; the usual cause is a probe that was still damp when you called it dry, or one that was only dipped to the tip. A pin reading under 150 mV is a wire off, not a probe, and it will not calibrate that either.
| State | Reading | Becomes |
|---|---|---|
| Dry air | 2876 mV | 0 % |
| Glass of water, to the line | 1232 mV | 100 % |
| Span | 1644 mV | about 16 mV per percent |
Those are one probe's numbers, on one board, and the point of printing them is not for you to type them in. It is so you know what a healthy probe looks like: a big, clean swing, dry well above wet. If yours swings a few hundred millivolts or sits pinned at one end, read the note on the v1.2 boards before you blame the wiring.
Six probes, one node.
A classic ESP32 has six analog pins that keep working with Wi-Fi on: 32, 33, 34, 35, 36 and 39. Wire each probe's output to one of them, share 3V3 and GND, and list the pins on the setup page: 35,34,32,33,36,39. Each probe reports under its own stream id, which is the board's id and the pin, and each is calibrated separately.
That is one node covering six pots on a bench, or six depths in one bed, or the six beds in a hoop house. Six is the board's limit rather than ours. Past six, the Analog Reader puts a proper 16-bit converter on the I2C bus and reads four more per chip, and the LoRa Field Node takes up to eight soil probes somewhere Wi-Fi cannot reach.
One note on the two pins with the smallest numbers: GPIO 36 and 39 sit next to the chip's Wi-Fi circuitry and are a little noisier than the rest. The node averages sixteen samples per read and then averages reads across the push window, which takes care of it, but if you are placing two probes rather than six, 35 and 34 are the quiet pair.
Knowing you can trust it.
An analog sensor's real failure is almost never the sensor. It is the wire, or a probe that slowly lost its coating to a season in wet soil. That failure is worth designing for, because the dangerous version of it is not a node that goes silent, it is a node that keeps reporting numbers that happen to be wrong.
An analog pin has no checksum to fail, so the node uses the one honest signal it has. A declared pin reading under 150 mV is reported as a wire off, in red on the status page, and no reading is folded into the push. A wire off looks like saturated soil to a naive reader, and a bed that reads soaked when the probe has fallen out of it is how plants die of thirst with a green dashboard. The count of wire-off reads sits next to the good ones, so "is my wiring actually alright?" has an answer instead of a guess.
The voltage is always sent, calibrated or not. If a probe's coating wears and its dry-air reading drifts over a season, the percentage drifts with it, but the raw record does not lie, and you can recalibrate at the endpoint from the history without driving out to the node. The percentage is a convenience derived from two points you chose; the voltage is what was measured.
Meanwhile the node sends a small heartbeat every 60 seconds whatever else is happening. So when a probe dies the heartbeats keep arriving while its readings stop, and your endpoint can tell the difference between alive but quiet and gone. That distinction is the reason the heartbeat is sent first, before the readings, every cycle.
One more piece of the same habit: each push says how long a stretch its average actually covers. The node keeps reading whether or not the network is up, so the first message after an outage can carry hours of readings, and it says hours rather than repeating the setting you typed.
What it sends.
Two kinds of message, both tiny, and both the same shape every other node in this library sends. Every cycle a batch of readings, the probe's voltage in volts and, once calibrated, its moisture in percent; every 60 seconds a lean heartbeat about the node's own health. Both carry a schema tag (oat-ods/0.3) so you can route and version them:
See the two message types
A batch of readings, sent every cycle:
{
  "schema": "oat-ods/0.3",
  "msg_type": "batch",
  "sent_at": "2026-09-06T14:26:00Z",
  "seq": 3000004,
  "source": { "tier": "oat-soil-moisture-node", "gateway_id": "gh2-bench",
              "farm_id": "riverbend-farm",
              "fw": "OAT-Soil-Moisture-Node/1.0.0" },
  "messages": [
    { "observed_at": "2026-09-06T14:26:00Z",
      "stream": { "id": "oat-3c8a1fa77d14:a35",
                  "location": "Greenhouse 2 / bench, pot 3" },
      "measurement": "voltage", "value": 1.862, "unit": "V",
      "agg": { "window_s": 300, "samples": 30, "method": "mean" },
      "source": { "physical_id": "oat-3c8a1fa77d14:a35",
                  "model": "capacitive soil probe" } },
    { "observed_at": "2026-09-06T14:26:00Z",
      "stream": { "id": "oat-3c8a1fa77d14:a35",
                  "location": "Greenhouse 2 / bench, pot 3" },
      "measurement": "soil_moisture", "value": 45.4, "unit": "%",
      "agg": { "window_s": 300, "samples": 30, "method": "mean" },
      "source": { "physical_id": "oat-3c8a1fa77d14:a35",
                  "model": "capacitive soil probe" } }
  ]
}
A heartbeat, sent every 60 s, so the endpoint knows the node is alive even when a probe has stopped answering:
{
  "schema": "oat-ods/0.3",
  "msg_type": "status",
  "observed_at": "2026-09-06T14:26:00Z",
  "state": "online",
  "source": { "tier": "oat-soil-moisture-node", "gateway_id": "gh2-bench",
              "farm_id": "riverbend-farm",
              "device_id": "oat-3c8a1fa77d14",
              "fw": "OAT-Soil-Moisture-Node/1.0.0" },
  "health": {
    "uptime_s": 315, "boot_count": 2, "reset": "poweron",
    "free_heap": 214800, "min_free_heap": 203600, "largest_block": 110592,
    "rssi": -68, "wifi_reconnects": 0, "push_ok": 5, "push_fail": 0,
    "transport": "https", "tls_ok": true, "chip": "ESP32",
    "temp_c": 54.4, "loops_per_sec": 1120,
    "lan_ip": "192.168.1.37", "ssid": "BarnWiFi", "mdns": "oat-gh2-bench.local"
  }
}
A capacitive probe has no serial number, so the stream.id is the board's own id followed by the pin: oat-3c8a1fa77d14:a35. That is the same shape the LoRa Field Node uses for its analog inputs. Which pin is which pot is recorded at your endpoint, not on the device, so label the wire. Swap a worn probe for a new one on the same pin, recalibrate, and the history of that spot carries straight on, with the change visible in the voltage record.
Want the whole format, both message types, every field, and the full measurement vocabulary? See the developer reference, or read the machine-readable JSON Schema.
For makers & trainers.
Frequently asked questions.
Which ESP32 pins can read a capacitive soil moisture sensor?
On a classic ESP32, only GPIO 32, 33, 34, 35, 36 and 39 work reliably, because they belong to the ADC1 block. The other analog pins (GPIO 0, 2, 4, 12 to 15 and 25 to 27) are on ADC2, which shares hardware with the Wi-Fi radio and stops returning readings while Wi-Fi is connected. GPIO 37 and 38 are ADC1 pins but are not brought out on the common devkit. This node defaults to GPIO 35 and accepts up to six probes on those six pins. On an ESP32-S3 the usable pins are 1, 2 and 4 to 10; on an ESP32-C3 they are 0, 1, 3 and 4; on an ESP32-C6 they are 0 to 3 and 6. The pins left out of each list are strapping pins that a probe would hold high at power-on.
Should I power a capacitive soil moisture sensor from 3.3 V or 5 V?
From 3.3 V on an ESP32. The v2.0 probe is specified to run from 3.3 to 5.5 volts and gives the same 0 to 3.0 volt output across that whole supply range, so 5 volts adds no signal, and the ESP32's analog pins are not 5-volt tolerant. On 3.3 volts a v2.0 probe reads roughly 2.9 volts in dry air and about 1.2 volts in water. If a probe reads nothing useful from 3.3 V, it is usually an older v1.2 board built with a timer chip that needs 5 volts.
How do I calibrate a capacitive soil moisture sensor?
Record two readings from the same probe: its output in dry air, and its output standing in a glass of water up to the line marked on the blade. Those become 0 and 100 percent, and soil reads in between. Calibrate every probe individually, because two probes of the same model can differ by hundreds of millivolts in the same glass of water. This node records both points from its setup page with two clicks, keeps them per pin, and sends the raw voltage alongside the percentage so the calibration can be revisited later from the record.
Is a capacitive soil moisture reading the same as volumetric water content?
No. A cheap capacitive probe outputs a voltage that falls as the soil around it gets wetter, and the percentage this node reports is that voltage placed between two calibration points, dry air and water. Volumetric water content and soil tension are calibrated physical quantities that account for the soil itself; sand, peat and clay give different capacitive readings at the same true water content. Capacitive probes are good for watching the shape of a dry-down curve in one pot or bed over time, which is a watering decision, and research-grade SDI-12 probes or tensiometers are the tools for a number that compares across soils.
Why does my soil moisture sensor read wet when it is not in soil?
Usually because the output wire is disconnected. An ESP32 analog pin with nothing attached floats at a few hundred millivolts, and because a capacitive probe's voltage falls as the soil gets wetter, a low floating voltage looks exactly like saturated soil. This node treats any declared pin reading under 150 millivolts as a wire off, reports it as such, and sends no reading for it, rather than reporting a wet bed that does not exist.
How long does a capacitive soil moisture sensor last outdoors?
A season or two in soil is typical for the cheap flat-blade probes, longer indoors. Capacitive probes have no exposed metal contacts, unlike the older resistive forks, but the solder mask over the sensing trace wears, the electronics at the top are not waterproof, and moisture wicking above the marked line ends the probe. Keeping the top end dry, sealing it with heat-shrink or a coating, and inserting only to the line extends the life. Because this node always sends the raw voltage, a drifting probe can be recalibrated from its own history and a replaced probe simply picks up the same stream on the same pin.
Where does the data from a DIY soil sensor node go?
Only to the endpoint configured on the device. A node running open firmware pushes each reading to whatever destination you enter during setup: your own webhook, your own MQTT broker, a hub such as Home Assistant, or a cloud service you choose. Nothing is transmitted anywhere else, and the destination can be changed later in the device's settings.